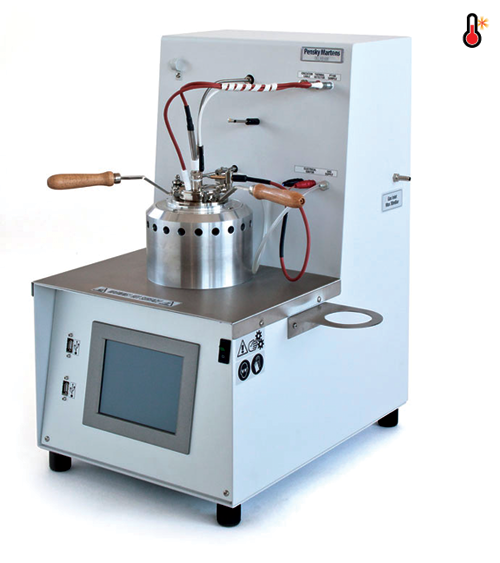
OilLab 600 – Pensky Martens |
 |
 Download Brochure Download Brochure |
ASTM D93 procedures A, B, C – ASTM D3941 – ASTM E502
DIN EN 22719
IP 34
ISO 2719
CE marked
Subject
Flash Point on petroleum products, gas oils, fuel oils, lubrificants, biodiesel. Suitable for flash point detection on different substances, waste materials, solvents…
Measuring Pensky Martens Principle
The sample is heated and stirred at specified rates, using one of three defined procedures (A, B, or C). An ignition source is directed into the test cup at regular intervals with simultaneous interruption of the stirring, until a flash is detected.
Measuring Parameters
- Temperatures: in °C
- Measuring range: +35°C … +370°C
- Resolution: 0.01 °C
- Accuracy: ± 0.1 °C
- Repeatability / Reproducibility: as per standards methods or better
Ignition system
- Gas with flame exposure device and / or
- Electric Lighter with electrical ignitor

Measuring Temperature Devices
- Sample temperature is measured with a platinum resistance PT100 Class A with SS sheath and high temperature resistant silicone cable
- Bath temperature is measured with a PT100 sensor
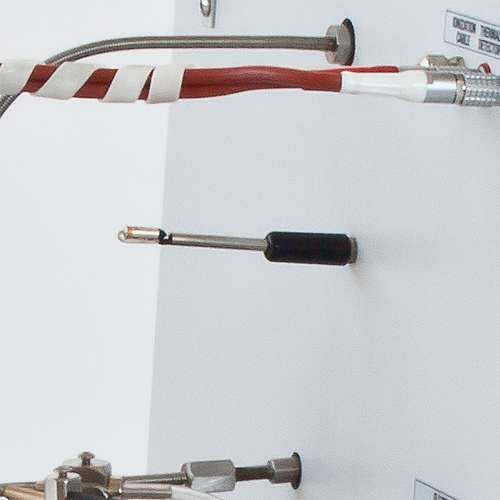
Dual flash point detection system
- By ionisation ring
- By thermal sensor

Barometric sensor
- Built-in sensor with automatic correction of results to a barometric pressure of 101.3 kPa automatically performed by the software at the end of analysis
Heating
- Electrical heater with heating rates as per procedures A, B, C
Cooling
- Built-in forced air fan
Test Cup
- Made of brass and provided with an high temperature resistant handle
- With sample level mark
Stirrer
- An electric motor drives a flexible transmission coil allowing the stirring of the product. Stirring speed as per selected procedures A, B, C
Shutter
- Automatic mechanism opening the shutter for the dip-in of the ignition device
Safety features
- Gas valve for closing the gas supply (max 30 mBar), at the end of the test
- Overheating protection with auto shut off during the test
- Auto fire detection by means of thermal fuse with acoustic alarm

Integrated Touch Screen Panel PC
- TFT/LCD 8″
- Resolution 1024 × 768, 16.2 M colours
- 2 × USB port for connection to an external printer and/or external PC
Lab-Link managing software
The software includes:
Analysis Menu
- Automatic execution of the analysis in accordance to the selected procedure (Standard method as per ASTM / IP / ISO / EN / DIN… norms of reference as well as costumized procedures)
- Automatic handling of samples with unknown flash point
- Display in real time of all the analysis parameters and status
- Fields for introduction of operator and product name
- Expected flash point temperature programmable
- Audible alarm and displayed messages at the end of the analysis and in case of errors and/or malfunctions
- Configuration menu with up to 20 preset samples and expected flash point
- Automatic barometric correction of results
Diagnostic Menu
- Direct access to all analog, digital, inputs and outputs
- Selectable value displaying: °C / Volt
Calibration Menu
- Automatic calibration of each temperature probe
- Up to 100 calibration points (standard with 5 and dynamic with up to 100 points)
- Programmable calibration frequency with selectable validity period and notice/lock-down at expiration date
- Last calibration date referred to each single probe displayed and relevant data printable
- Display of calibration diagram
Data utilities
- Archive viewer for files recall
- All analysis stored in Excel® compatible format as well as in jpg format
- Storage capacity for more than 60’000 analysis
- LIMS compatible
Electrical Supply
- 220V ± 15% / 50 to 60 Hz
- 115V ± 15% / 60 Hz
Cord Cable:
- 3 conductors flexible cable with schuko plug
Ambient Temperature
- Max 35°C
- H.R. 80%
Dimensions
- width 48 cm
- depth 30 cm
- height 52 cm
Weight
- 27 kg
Spare Parts
- LAB-600/05-23: heater collar
- LAB-600/06-21: gas valve
- LAB-600/07-01: electrical ignitor
- LAB-600/07-03: micro switch
- LAB-600/07-04: handle
- LAB-600/07-05: gas ignitor
- LAB-600/08-12: PT100 product
- LAB-600/08-13: detection / ionisation cable
- LAB-600/08-14: PT100 Bath
- LAB-600/09-04: gas reducer
- LAB-600/09-05: calibrated brass crucible
- LAB-600/09-06: calibrated brass crucible complete with movement
- LAB-600/09-07: cover cup movement only
- LAB-600/10-04: PCB fuses, box of 10
- LAB-600/10-05: main electronic board
- LAB-600/11-01: silicon tubing, 1 meter
- LAB-600/11-02: stirrer / flexible
- LAB-600/12-01: voltage transformer for ignitor
- LAB-600/20-01: support PT100 Teflon
Calibration Tools
- OilLab 80: calibration decade box – PT100 simulator
- OilLab 81: set of connectors and cables for cold range
Software Features
The Analysis Menu
Easy, user-friendly graphics display the essential analysis parameters in real time during testing. A graphical format allows the operator a quick view of the desired parameters displayed on the monitor of the integrated touch screen panel PC. A simple click to start a new analysis.

Up to 20 Sample Presets
In order to aid the operator and reduce set-up time, it is possible to introduce the characteristics of a sample such as: name of the file, expected flash point and procedure / test method to be carried out by storing the data in one of the 20 available presets. Thanks to this pre-programming, products that are commonly tested may have their own procedure or profile. By selecting the relevant preset, set up time of analysis preparation is greatly reduced.
The Calibration of the Temperatures Sensors
Two calibration modes assure an improved precision. The standard calibration is based on 5 predefined points while the dynamic calibration can be performed on up to 100 points allowing to set the points within the range of greater interest. Calibration validity can also be set. This ensures greater compliance with internal procedures in adherence to the quality system of each laboratory. The calibration can be scheduled every 3, 6, 12 and 24 months or not have an expiry date. It is also possible to by-pass the expiration date alert from the system and allow the user to continue the analysis or “lock-out” the operator from continuing the analysis.

The Diagnostic Menu
By means of the diagnostic menu it is possible to perform an accurate check of the instrument and its essential components. Stirrer, gas valve, shutter, cooling fan, heater and electrical ignitor can be monitored by pressing the corresponding key. Diagnostic monitoring of the sample and bath temperature sensors will be in Volts and in °C while the Ionization ring and thermal detector will be in Volts. The values of the barometric sensor will be in Volts and kPa. All of these data that can be valuable information in the trouble-shooting in case of failure.
Analysis Setup
To each product its analysis. It has never been so easy to perform the set-up of the analysis. The operator will choose between a procedure for an unknown sample and a sample with an expected flash point. Set temperature of the latter by sliding finger on the temperature bar of the touch screen panel PC. Select method to be performed between A, B and C with its heating ramp and stirrer speed. Set interval of degrees for the introduction of the flame and / or ignitor to the sample cup. Select, if desired, to save all parameters in one of the 20 available presets.

Password Protection
The password protection allows the storing and securing of the setting parameters. By activating the password protection, access to the configuration parameter is limited and only permitted to the administrator.